Pages

Tuesday, December 26, 2017

December Art Bead Scene Challenge

Title: Still Life with Tulips and Fruit Bowl
By: Susan Valadon
Date: 1924
Medium: Oil on Canvas


Every month the Art Bead Scene challenges their readers to create jewelry inspired by the featured artwork. The only rule is that you must use at least one art bead in your piece!  This month's inspiration piece is perfect for Christmas time.  I love the reds and greens in  "Still Life with Tulips and Fruit Bowl" by Susan Valadon.  Suzanne Valadon (1865 - 1938) was a French painter and artists’ model who was born in France.  In 1894, Valadon became the first woman painter admitted to the Société Nationale des Beaux-Arts. 


  Red Rose Art Necklace by BayMoonDesign

                                    Red Rose Art Necklace by BayMoonDesign

I used a lampwork bead with deep red, olive green and navy blue in it.  I added a handmade green head pin and a brass bead cap to it.  I used red glass beads in the necklace to brighten the color palette.  I spaced the green blister pearls with small brown pearls. I also used  jasper and special a handmade fiber and paper bead of my creation.  I included a pretty polymer clay red rose art bead by Leah Curtis.  I love how the necklace turned out.  It is available for purchase HERE.  I think it would make a very special gift.

Thursday, December 21, 2017

Art Elements Christmas Blog Hop


Photo of owl by Philip Marsh on Unspla
Photo by Philip Marsh on Unsplash
Welcome to the Art Elements Christmas Blog Hop sponsored by Art Elements.   Anyone can join in this challenge and you can make your ornaments from any material you please and in any style you like – it just has to be hand made. The goal of the challenge is to have fun and maybe be inspired to try something new and make something different.
front of owl ornament by BayMoonDesign
owl ornament by BayMoonDesign

I have been saving Altoid tins for a number of years. I like to have them on hand to ship delicate pieces of jewelry and I store bead mixes in them too. Recently, I had been toying with the idea of making Christmas ornaments from them. I have collected a few ideas of what other folks have done with Altoid boxes here on Pinterest. There are also several tutorials there. After gathering ideas and reading tutorials, I decided that my Altoid tin ornament will be centered around some cute owls that I found on a Christmas card given to me by a dear friend in the 1980's.


Back of the ornament
I used that card as the background on the ornament and to cover the back and sides of the tin I used some paper with a wood pattern that I had on hand.  I dug into my collection of art beads and a ceramic with a heart on it. I added a few beads to it.   I used beading wire and crimp beads to connect them.  Before attaching them to the Altoid tin I used a hole punch and placed two small holes which I centered on the bottom of the tin prior to attaching any paper to the tin.  I opened a jump ring and inserted into the two holes, and then closed the jump ring.  This is where I attached my strand of beads.  I then covered the inside of the tin with part of the card.  To cover the bottom and sides, I used wood patterned paper. Modge Podge was used to adhere the paper to the tin.  I used scraps of white trim around the edges and added a snowflake that I made from paper.  I also added a tiny tree and owl that I found at the store.  The final touches to the ornament include a strand of white and brown twine that I ran around the sides and up to the top.  This twine serves as a way to hang the ornament.  I also added a white bow at the top.   I made 2 ornaments using this owl card.  I plan to give one of my friend that sent me the card in the '80's for her family Christmas tree and one to my daughter who loves owls.  Be careful what you send me!  It just may make it back to you.

Photo of hot beverage by Toa Heftiba on Unsplash
Photo by Toa Heftiba on Unsplash
Now go and grab a hot beverage and sit back and enjoy seeing what ornament other folks made for this blog hop.  A special thanks to  Lesley Watt for organizing this.  A visit to the blogs and comments are appreciated.

Guest Designers

Art Elements Team


Happy Holidays!
Kathy

Thursday, December 14, 2017

We're All Ears :: 3rd Annual Use Your Leftovers Challenge!


Welcome to the We're All Ears 3rd Annual Use Your Leftovers Challenge.  The directions began with a request to take a picture of my bead table.  I hate to show what it looks like.  It is amazing I can find anything on it and sometimes I can't.

My bead table

Next, we were directed to find a divided box, bin, baggies or small bowls and go through the stash on your  table picking out coordinated sets that you can use to create earrings. Put these pieces together with ear wires, chain, findings, etc in each division of the box.  Work quickly! Don't take too much time, just focus on filling the sections.  


Divided box with earring parts

I have a divided box that I use to store earrings components that need to be turned into earrings.  I like to keep my components together in small plastic bags.


I set a timer and allowed 1 hour to make whatever I could in that time.  


Modern  Red Earrings by BayMoonDesign
Modern  Red Earrings by BayMoonDesign

My first pair of earrings  are modern red earrings.  I love the casual look of the red lampwork paired with black ear wires and black jump rings. These are red earrings that are about 1 inches long from the top of the ear wire. The beautiful red lampwork beads were made by artisan Sue Kennedy. I love how the glass looks in the light. The color makes them perfect for lots of holidays like the Christmas, Valentine's Day, Memorial Day.

Bohemian Lilac Earrings by BayMoonDesign
Boho Lilac Earrings by BayMoonDesign
The next pair that I made are boho lilac earrings.  I combined lilac ceramic beads with sterling silver ear wires. These modern geometric earrings are a little over an inch from the top of the ear wire to the bottom of the ceramic. I think that they have a fun and casual look. I love how the lilac ceramics have a hint of other pastel shades. I just love the color--so hard to find. The ceramics are by artisan Marsha Neal Studio.

Pink Heart Earrings by BayMoonDesign
For my last pair,  I paired the  pretty pink heart ceramics with pink and rose Swarovski crystals and sterling ear wires. I love the sterling silver hearts that are at the bottom of the floral heart design. The ceramic hearts are by British artisan Natalie McKenna of Grubbi.   These earrings are available for purchase here.

In the spirit of giving, , the organizer of this blog hop is offering a giveaway of an Emergency Earring Making kit - with beads and findings to use to make multiple pairs of earrings - valued at over $40.  In order to be chosen, you have to participate in the blog hop starting on December 15th! Winner will be chosen at random from all eligible entries on December 25th.  The LinkyTools party is open until December 25th so you have lots of time to play and visit!

Let's get this leftover party started right HERE at Erin's website. Thanks for organizing this Erin.


Wednesday, December 6, 2017

7th Annual Ornament Blog Hop


abstract photo of Christmas tree
Photo by Tim Mossholder on Unsplash
Welcome to the 7th Art Bead Scene Ornament Blog Hop sponsored by Heather Powers of HumblebeadsThis is an inclusive creative challenge. Hanukkah, Kwanzaa or Winter Solstice themed decorations along with traditional Christmas ornaments are all possibilities. The idea is to have fun.
The instructions were simple:
Create an ornament using handmade components or art beads.


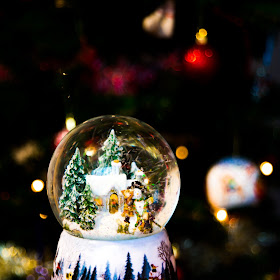
Pretty snow globe
 Pretty snow globe - Photo by Darren Coleshill on Unsplash
I have been saving Altoid tins for a number of years. I like to have them on hand to ship delicate pieces of jewelry and I store bead mixes in them too. Recently, I had been toying with the idea of making Christmas ornaments from them. I have collected a few ideas of what other folks have done with Altoid boxes here on Pinterest. There are also several tutorials there. After gathering ideas and reading several tutorials, I decided that my Altoid tin ornament will be centered around a cute snow globe 3D sticker that I found. I have always loved snow globes. I guess that is because over the years, I received a number of them as gifts at Christmas time.

Altoid Tin Ornament by BayMoonDesign
I also save Christmas cards that I think are especially pretty. I went through my collection of cards and found a silver card with embossed snow flakes. I used that card as the background on the ornament and to cover the back and sides of the tin.  I dug into my collection of art beads and found a turquoise ceramic with a red heart on it.  I believe it was sent as a decoration on box containing an Art Bead from Mary Harding. Her packages are so pretty!  The colors in the bead matched the colors in the snow globe.   I found a couple of other complimentary beads to add.  I used beading wire and crimp beads to connect them.  Before attaching them to the Altoid tin I used a hole punch and placed two small holes which I centered on the bottom of the tin prior to attaching any paper to the tin.  I opened a jump ring and inserted into the two holes, and then closed the jump ring.  This is where I attached my strand of turquoise and red beads.  I then covered the top, bottom, and sides with the silver paper and Modge Podge.  I used scraps of silver Christmas trim, snowflakes that I made from paper, wooden ivy, and added some bling.  I ran a piece of red ribbon around the outside to add some more color.  I plan to give one of my best friends this for her family Christmas tree.

Photo by Taylor Franz on Unsplash

Now go and grab a hot beverage and sit back and enjoy seeing what ornament other folks made for this 7th Annual blog hop.  A special thanks to Heather Powers of Humblebeads.com for organizing this.