I have been saving Altoid tins for a number of years and have several blogs about creating Christmas ornaments with them. My first blog on this topic goes back to 2017. I have also collected ideas of what can be done with Altoid tins as well as tutorials here on Pinterest.
I received an invitation to create some holiday ornaments for the Biggs Museum of American Art . The museum hosts a reasonably priced holiday market for children. They purchase handmade items by museum member artisans that are purchased then purchased for family members.
I went through my stash of tins, card stock, tools, old Christmas cards, ribbons and trim, earrings, holiday pins, odds and ends. Two essentials for this project are a hot glue gun and Modge Podge which I had. The best part of this project was that I did not have to buy a single thing. I had everything I used already at home. I admit I worked with children for 35 years so I have a rather large collection of holiday pins and jewelry that I hope will bring joy to others as I repurpose them. I wanted them to enjoy life outside of my jewelry box.
I pull the Altoid tins apart with my bare hands. I take advantage of the larger width of the bottom of the tin and use decorations that wide in them. The tops are used for the thinner items. All of my tins have their surface covered with carefully cut to size high quality card stock and Modge Podge which is generously applied on both sides of the tin. The Modge Podge acts as a glue as well as a sealant. When it dries it is invisible.
My first ornament features a Santa from a holiday pin. I pulled the pin off with pliers and hot glued the pin to cardstock that has the Modge Podge already applied and dried.
I enjoyed seeing a favorite Christmas card that I saved. Now it is on the front and back of the Santa ornament. The plaid ribbon is repurposed from an old toy.
The snowman comes from my extensive collection of 1980's button covers. I bet a lot of my readers have never heard of button covers and that is probably a good thing. The snowflake is a repurposed earring. I just snipped the post off the back and hot glued it on.
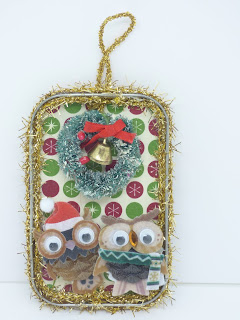
This ornament has a repurpose Christmas wreath pin and 2 owls that are 3D stickers that I hot glued on.
All of paper that I used is high quality card stock. It has the weight and thickness needed.
I used a variety of trims along the edges. Hot glue is used to attach the trims. A metal punch makes small holes at the top. I pulled gold cord through both of the top holes. Sometimes when I make these ornaments I hang beads from the bottom. On some of the ornaments has small silver bells hung. The sky is the limit on what you can use and create!
 |
| Santa ornament by BayMoonDesign |
My first ornament features a Santa from a holiday pin. I pulled the pin off with pliers and hot glued the pin to cardstock that has the Modge Podge already applied and dried.
 |
| Back of the Santa Ornament from BayMoonDesign |
 |
| Snowman Ornament by BayMoonDesign |
The snowman comes from my extensive collection of 1980's button covers. I bet a lot of my readers have never heard of button covers and that is probably a good thing. The snowflake is a repurposed earring. I just snipped the post off the back and hot glued it on.
 |
| Mr. and Mrs. Owl Ornament by BayMoonDesign |
 |
| Front of Sleeping Owls Ornament by BayMoonDesign |
 |
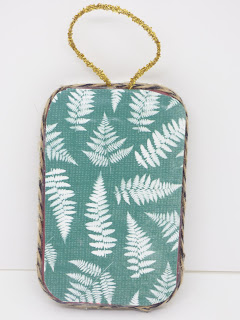
| back of Sleeping Owls Ornament by BayMoonDesign |
 |
| Sleeping Owls Ornament by BayMoonDesign |
My hope is that these ornaments from repurposed items will be enjoyed for many years to come.

They are simply adorable, Kathy!
ReplyDeleteSo creative and so cute.