Saturday, December 31, 2016
Saturday, December 24, 2016
Happy Holidays to my ETTEAM with a Celebration of Handmade and Vintage
https://unsplash.com/@aaronburden
This is a selection of ETTEAM items that make great additions to your home or as a gift. What makes them special is they are handmade or vintage. That is ETTEAM? We are a small, structured close-knit team on Etsy an online selling site. This team offers mutual promotion on social media off Etsy, a sense of community, discussion and support, lots of exposure and warm helpful people. We're a team for advice and learning as well as promotion. We strive for fairness. Everyone participates.
These items are picked by member Charlene Sevier.
Now, look at the picks---
Pocket-sized hand-cut and painted wood bears
etsy.com
I feel like I know these folks personally. In fact, some I have known online for probably at least 10 years. I even got an invitation for coffee from one of the members when she saw I was in her town on a recent camping trip. I am sure you would be happy and satisfied with a purchase from any of the Etteam. Gives us a try! I know you will be happy.
Happy Holidays to all BayMoonDesign blog readers and ETTEAM members.
etsy.com
I feel like I know these folks personally. In fact, some I have known online for probably at least 10 years. I even got an invitation for coffee from one of the members when she saw I was in her town on a recent camping trip. I am sure you would be happy and satisfied with a purchase from any of the Etteam. Gives us a try! I know you will be happy.
 |
| https://unsplash.com/@benwhitephotography |
Friday, December 16, 2016
We're All Ears :: December Inspiration Use your Leftovers Challenge
We're All Ears :: December Inspiration
Welcome to the 2nd Annual Use Your Leftovers challenge sponsored by Erin Prais-Hintz!
This is a perfect challenge for me--use some of my bead leftovers and I have lots. I usually have multiple beading projects going at the same time. My beading table is always a mess unless I have cleared it for public viewing which is rare. The only positive about my mess is that I keep it contained all in one room which I refer to as the "jewelry room". The door is usually shut when I am not in it because I have 3 beloved cats who could potentially die from swallowing beads, wire, etc. These cats also like to stretch out all over the table and cause everything to go flying. The cats are only allowed in there when I am there to supervise.
 |
| My messy beading table |
There is only one thing to do with a bead table mess like that this and that is to play: Leftover Transformation Game.
This is how to play:
First, take a picture of the craftermath from your bead feast. Done
Next, find a divided box, bin, baggies or small bowls and go through the stash on your festive table picking out coordinated sets that you can use to create earrings. They don't need to be same. Put these pieces together with ear wires, chain, findings, etc in each division of the box. Work quickly! Don't take too much time, just focus on filling the sections.Think of this like your staging area for Leftover Transformation. Done
 |
| My Divided Box with Earring Parts |
Now, kick your creating into high gear! Consider this a Quickfire challenge...Put on some fun music...Set a timer (challenge yourself to see how many pairs of earrings you can create in an hour...or 15 minutes... or make one pair a day for 7 days... whatever works for you!). DON'T THINK ABOUT IT TOO MUCH (leftovers are supposed to be easy!), just make it happen. Sometimes the best things happen when you are on a deadline and you can't afford the time to overthink! Done
Once I got all of the parts assembled in the box. I decided to focus on earrings that used similar parts. Once I had all of my jump rings, headpins, ear wires and silver out, I focused on using those parts. It turned out to be much more efficient than my usual method of making several very different earrings over a period of days. I created these earrings in a few hours.
 |
| Modern Navy Blue Pearl Earrings by BayMoonDesign |
 |
| Anchor Earrings by BayMoonDesign |
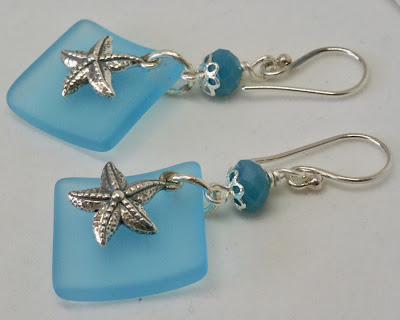 |
| Starfish earrings by BayMoonDesign |
 |
| Light Green Geometric Earrings by BayMoonDesign |
 |
| photo credit:: https://unsplash.com/@benwhitephotography |
These earrings are great for stocking stuffers. They also make wonderful gifts for teachers, co-workers and friends. They are available for purchase in my online store just in time for celebrating all the winter holidays and festivities!
Now, let's see what tasty Leftover Transformation creations are posted on at the blog party.
Now, let's see what tasty Leftover Transformation creations are posted on at the blog party.
A fun challenge--thank you Erin Prais-Hintz.
Wednesday, December 14, 2016
Sunday, December 11, 2016
6th Annual Ornament Blog Hop
 |
| photo credit :: https://unsplash.com/@joannakosinska |
This is the 6th Annual Ornament Blog Hop sponsored by Heather Powers of Humblebeads.
This is an inclusive creative challenge. Participants may make something inspired by Hanukkah, Kwanzaa or Winter Solstice themed decorations along with traditional Christmas ornaments.
I made a traditional Christmas ornament For my ornament, I grabbed a lesson from Heather Power's book Bead Making Lab. In her book, she demonstrates how to make a blue bird of happiness. I used white air-dry clay which is a new material for me. I found it easier to work with than polymer clay.
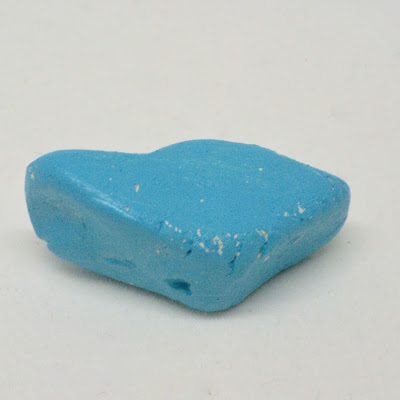 |
| Blue bird made from white air dry clay |
After applying a little more teal blue paint, I drew some feathers with a black fine-point permanent marker and applied some gray acrylic craft paint to create my blue bird. I love the folk art appearance that bird has after the gray is used.
 |
| Blue Bird of Happiness Ornament by BayMoonDesign |
For the ornament portion of this, I adapted directions that Heather Powers posted on a nest ornament blog that she did a while back. My ornament is similar, but it is different too.
Supplies:
Blue bird-Bay Moon Design
Disk bead - Bay Moon Design
Czech glass leaf
3 red 4mm red crystals
1 brass 3" headpin
1 brass 7mm jump ring
34" brass color 18 gauge wire
3" brass color 22 gauge wire
Directions:
1. Cut 4" of the 18 gauge wire, create a large spiral on both ends and hammer with a ball peen hammer.
2. Form a 2" circle with the remaining wire, wrap the wire around into a circle two more times to form the wreath/nest. Continue wrapping the wire around the nest to form the texture on the nest. Leave a 4" tail of wire. Form a loop at the top of the nest and wrap the remaining wire around the loop.
3. String the 3 crystals on the 24 gauge wire, center and twist the wire to hold the crystals in place. Wrap the wire under the top loop.
4. Put a headpin through the Czech bead and make a loop and put the loop through the wire of the nest to attach securely.
5. Attach the wire hanging to the nest.
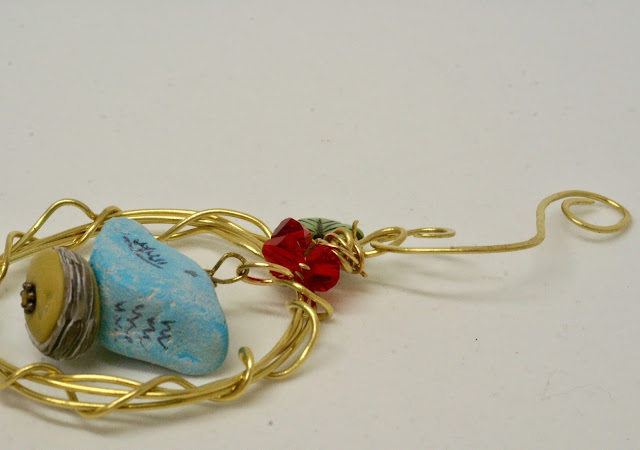 |
| Blue Bird of Happiness Ornament on Handmade Hanger by BayMoonDesign |
I plan to give this ornament to by daughter for her Christmas tree.
 |
| photo credit by :: https://unsplash.com/@evelynchin |
A special thanks to Heather Powers for organizing this blog hop and also for sharing her knowledge and skills.
Wednesday, December 7, 2016
Tiny Treasures
 |
| Unfinished Cigar Box by BayMoonDesign |
Way back in September the Art Jewelry Elements challenge inspired me with the inspiration of trees as the theme. This challenge also inspired me to try something new. I was gifted some green scrapbook paper with trees on it along with some other prints. I thought this paper would be perfect to cover a cigar box that I had sitting in a closet.
I also had some scrapbook paper that looked like old newsprint that I used to line the inside of the box. I had never done this before and I was pleased by how it turned out. At the time of this original blog, I said that I planned to put feet on the box, a knob, and hinges. It was going to be a gift for my son. I thought it could hold some tiny treasures.
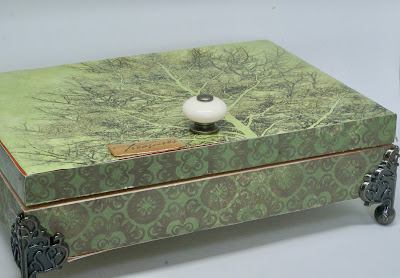 |
| Finished Tree Inspired Box by BayMoonDesign |
 |
| Inside of the Tree Inspired Box by BayMoonDesign To create a box like mine, you need the following Materials: Cigar box (Some cigar stores will sell these to you. You can buy online also. Enough sheets of scrapbooking paper to cover your box You can also use any other kind of paper, but scrapbooking paper works best because of its thickness and durability. Paper trimmer Pencil Ruler or measuring tape Mod Podge Brush Paper Towels After removing hardware from the box, I steamed some of the stickers off the box and did a little sanding. I measured the surface of each flat area to be covered with paper and cut the paper to size. I used a brush to apply the Mod Podge. After the Mod Podge dries, an outer coat should be applied. The paper may get bumps on it when wet, but it dries flat. |
 |
| Lid of Bird Cigar Box by BayMoonDesign |
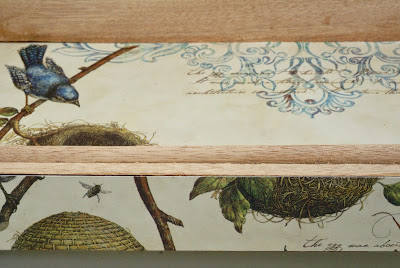 |
| Inside of by Bird Cigar Box by BayMoonDesign |
 |
| Front of the bird box by BayMoonDesign |
 |
| Bird box by BayMoonDesign |
 |
| Purple box by BayMoonDesign |
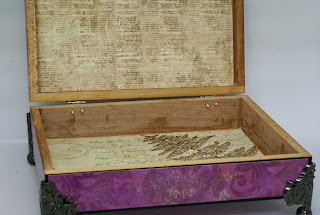 |
| Inside of box by BayMoonDesign |
Which box is your favorite?
Subscribe to:
Comments (Atom)


